Operating Your Zoom Tutoring Platform
(Click here to learn how to install and set up the Zoom tutoring platform.)
Once you have installed the Zoom online meeting software on your PC, laptop, notebook, or tablet, you will be ready for your online lessons. The following is a guide to using the platform.
Joining a Lesson
- Prior to each of your scheduled weekly lessons, you will receive a notification email from us with a subject line that reads something like, Scheduled Lesson Notice - Mon 16 Mar 2020. This email will contain all the details regarding your lesson.
If you haven't received such an email by 24 hours prior to a scheduled lesson, please let us know as soon as possible - the email may have gone astray or not been sent.
- Shortly (up to 15 minutes) before your lesson is scheduled to begin, open the notification email, confirm the details including the scheduled day and time, and click on the link to join the lesson.
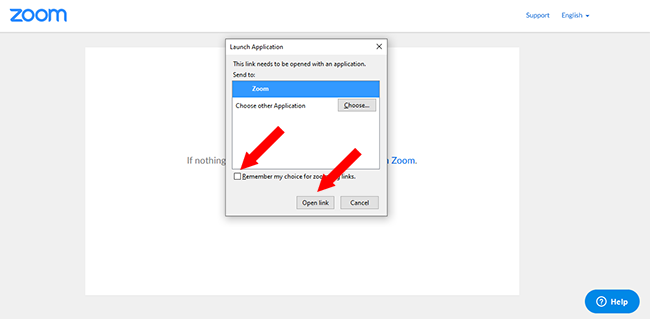
- You will be directed to the Zoom website, where you will be presented with the Launch Application window shown below.
Check the box to select Remember my choice for zoommtg links (to avoid having to perform this step for future lessons) and then click on the Open Link button.
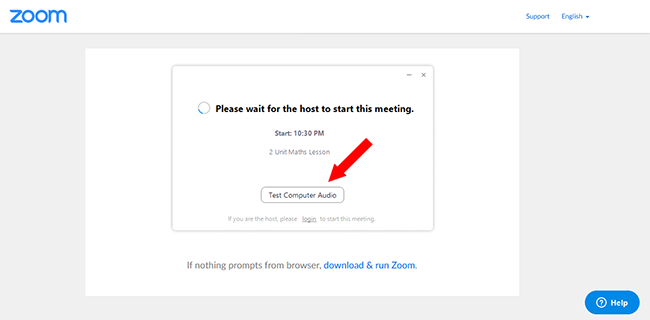
- If you have attempted to join the lesson prior to the scheduled start time, you will normally have to wait for the host to start the lesson.
You can take this opportunity to test your computer audio at this time if you wish, by clicking on the Test Computer Audio button.
- On some occasions you may be permitted to join the lesson before it started by the host. In this case you can simply enter the lesson and wait for the other attendee(s) to arrive.
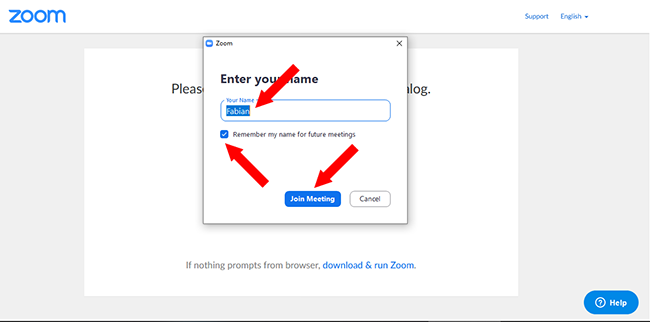
- Before entering the lesson, you will be asked to enter your name. Type in your name, check the box to select Remember my name for future meetings, so that you won't need to type it in each time for future lessons, and then click on the Join Meeting button.
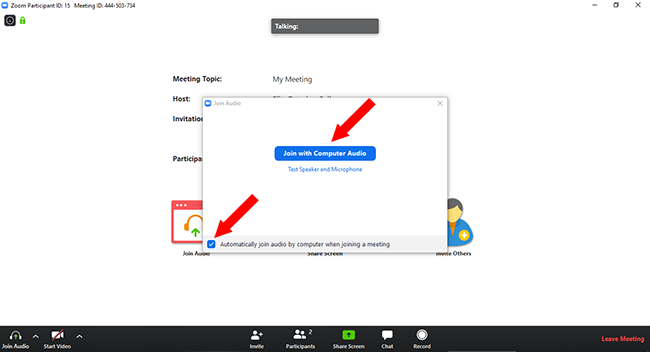
- To enter the lesson, click on the Join with Computer Audio button. Ensure that the check box to select Automatically join audio by computer when joining a meeting is checked, to avoid having to perform this step for future lessons.
You will have now entered the lesson successfully and will be ready to commence.
Please ensure that there is little to no background noise in your room during the lesson as it will be very distracting to the others in attendance.
Using the Tutoring Platform
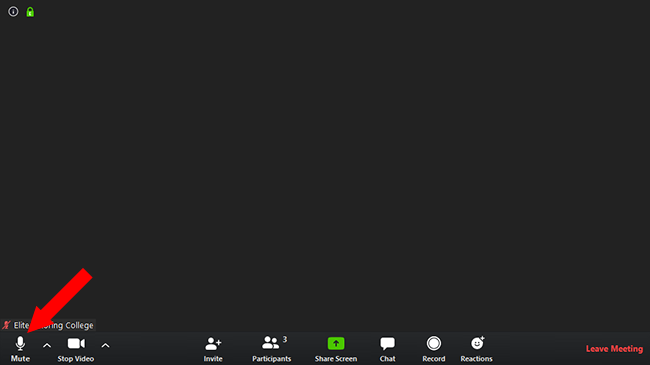
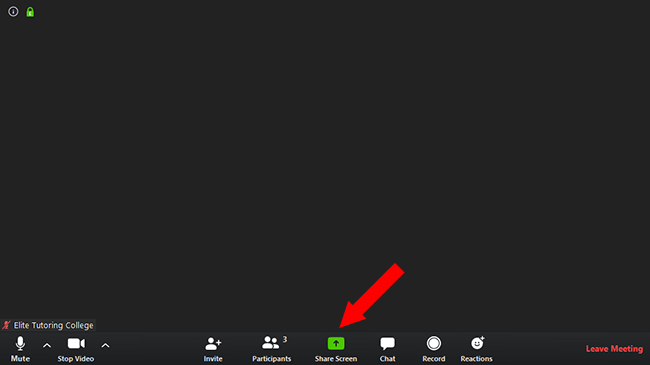
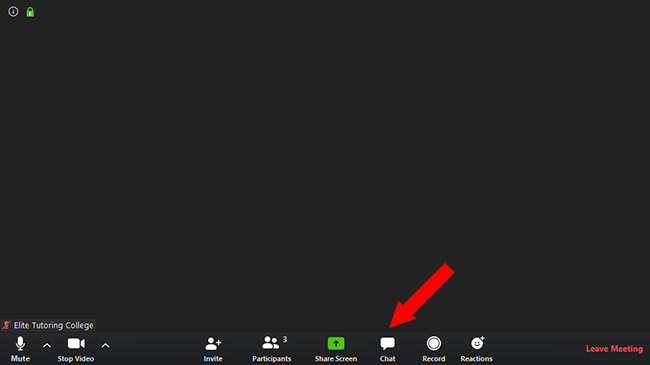
- To toggle your microphone on and off, click on the Microphone icon at the bottom left corner of the window. When the icon has a red slash through it, your microphone is muted.
Click on the arrow to the right of the microphone icon to select which microphone and speakers are used and to access audio settings.
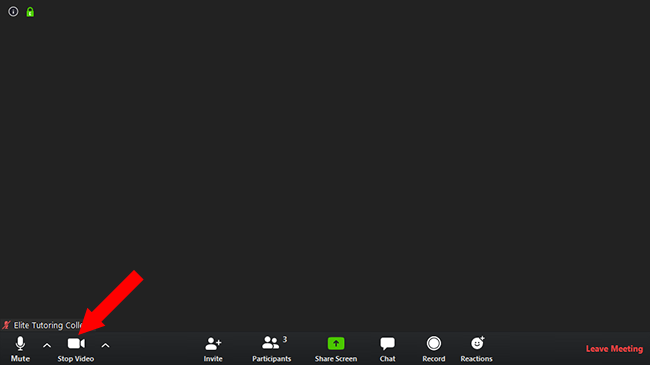
- To toggle your camera on and off, click on the Video icon at the bottom left corner of the window. When the icon has a red slash through it, your camera is inactive.
Click on the arrow to the right of the video icon to select which camera is used and to access video settings.
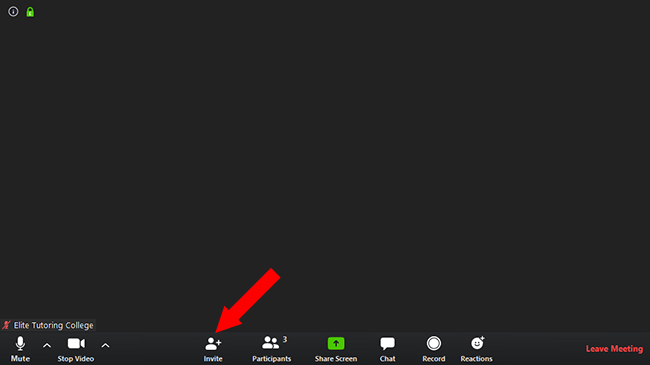
- The Invite icon is used to invite more participants to the lesson. This function will generally be locked by the host however, as only the host is permitted to do this.
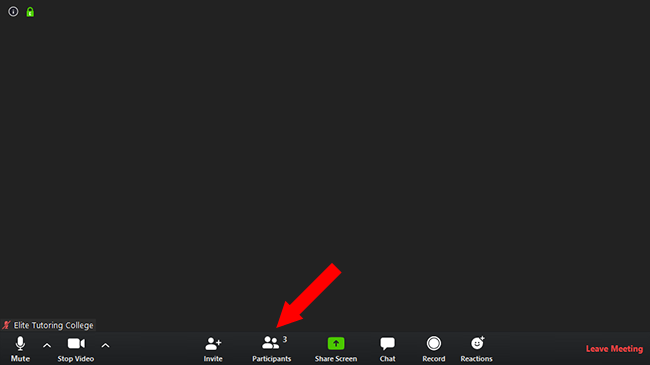
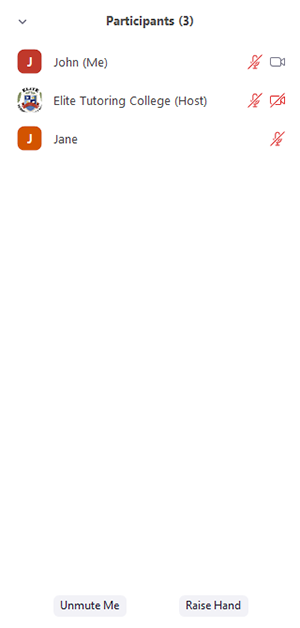
- The Participants icon toggles on and off the participants sidebar.
This shows a list of all the participants in the lesson and the status of their microphones and cameras. From here you can also enable and disable your own camera, mute and unmute your own microphone, and raise your hand in the lesson.
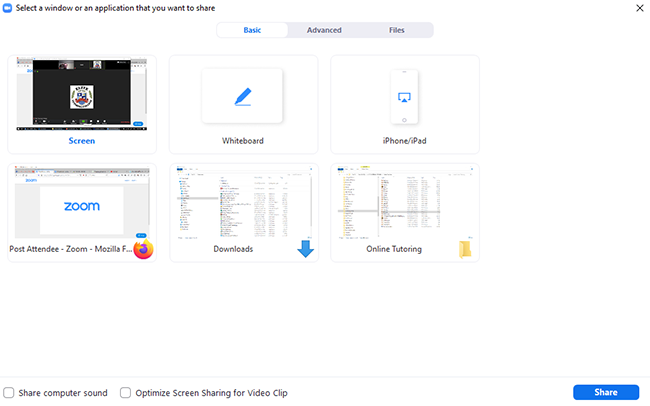
- The Share Screen opens up the Share window.
The Basic tab of the Share window allows you to share your screen, the Whiteboard, or any open window on your device.
When you share your screen or any open window, you will have the ability to annotate whatever is being shared. It is recommended that you use a graphics tablet or a computer with touch screen and stylus to be able to make clear annotations.
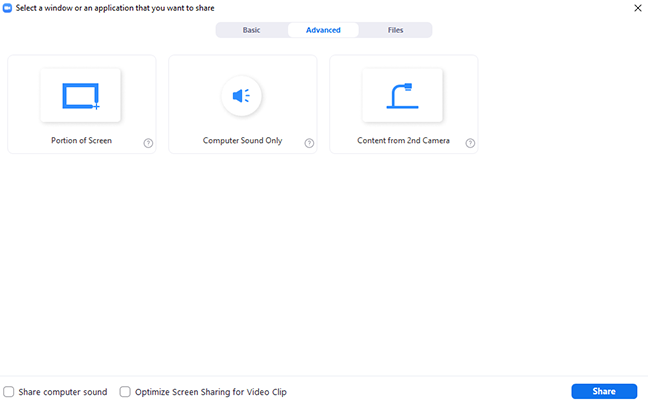
The Advanced tab of the Share window allows you to share a specific portion of your screen, your computer sound only, or content from a second camera on your device.
When you share a portion of your screen, you will have the ability to annotate whatever is being shared. It is recommended that you use a graphics tablet or a computer with touch screen and stylus to be able to make clear annotations.
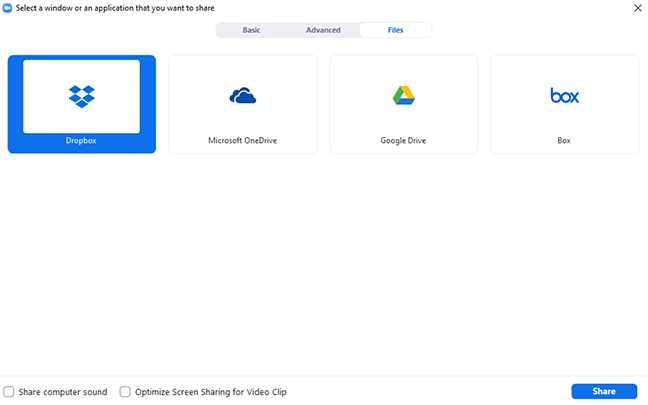
The Files tab of the Share window allows you to share your files from Dropbox, Microsoft OneDrive, Google Drive, or Box.
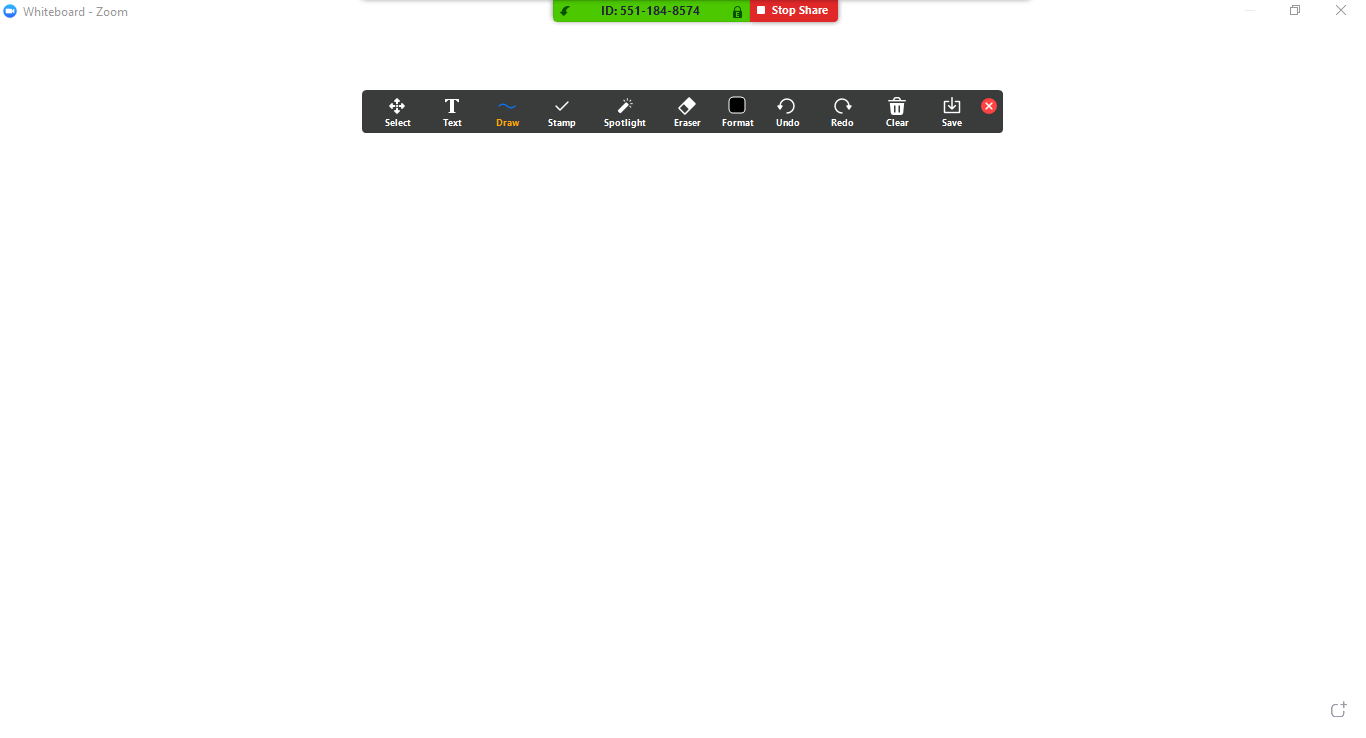
- The digital Whiteboard allows you to hand-write or draw anything, as you would on a regular whiteboard, and share it with the other lesson participants. It has a wide array of formatting options available with which to enhance the presentation of your graphics.
It is recommended that you use a graphics tablet or a computer with touch screen and stylus when using the whiteboard to allow you to make clear, legible graphics.
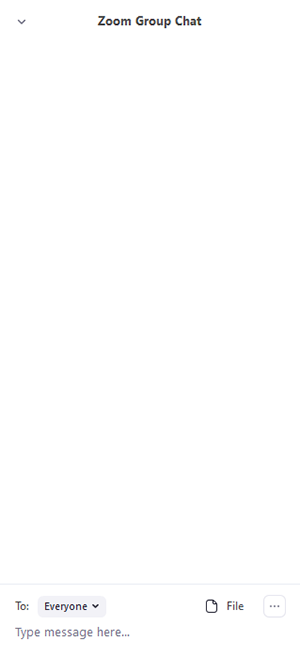
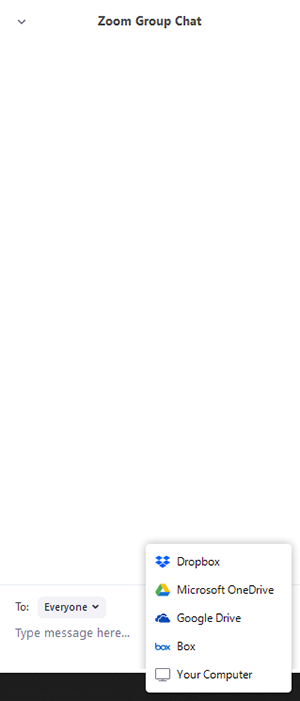
- The Chat icon toggles on and off the Group Chat sidebar.
This allows you to chat with any or all of the other participants of the lesson via text.
It also allows you to share files from Dropbox, Microsoft OneDrive, Google Drive, Box, or from your device.
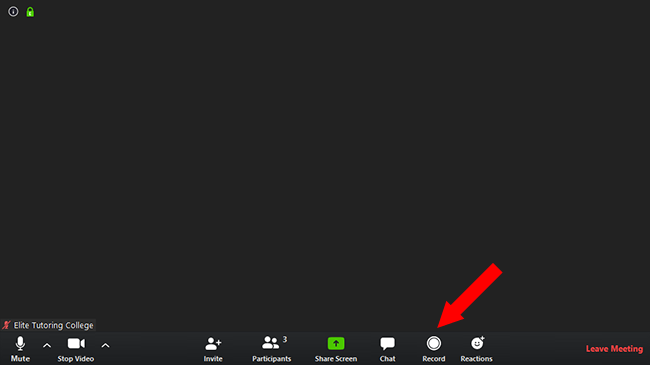
- The Record icon is used to record the lesson. This function will generally be locked by the host however, as only the host is permitted to do this.
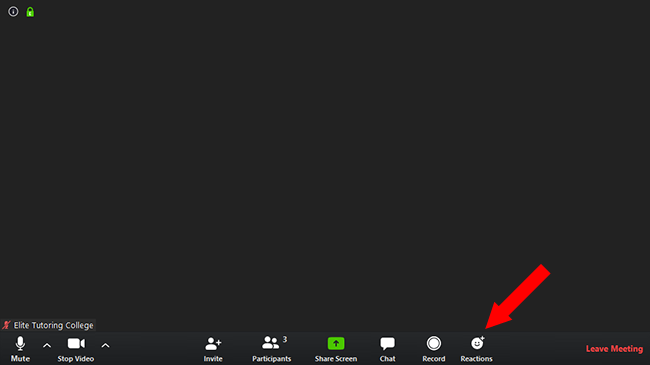
- The Reactions icon allows you to display reaction emoticons in the lesson.
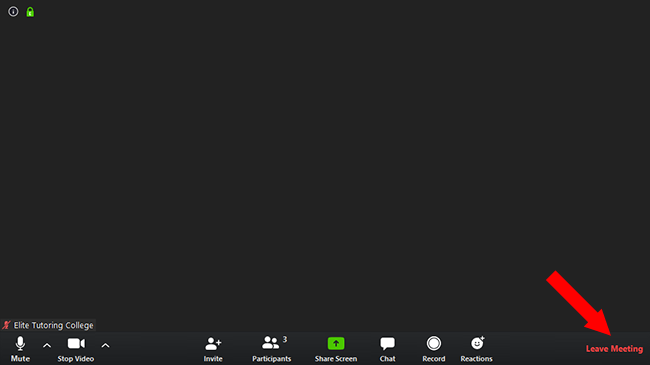
- To leave the lesson, click on the Leave Meeting link at the bottom right. You will be prompted to confirm that you are sure you wish to leave before you are removed from the lesson.
